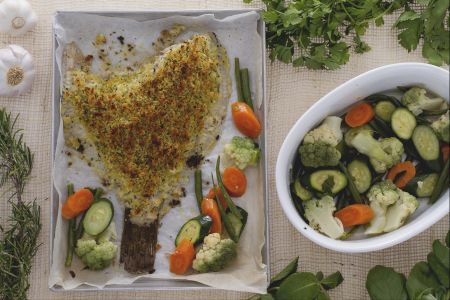
Stuffed pickled cucumbers
Stuffed pickled cucumbers are a fresh vegetarian appetizer with an exotic touch, served on a cherry tomato and peanut sauce. Discover the recipe!
- Easy
- 40 min
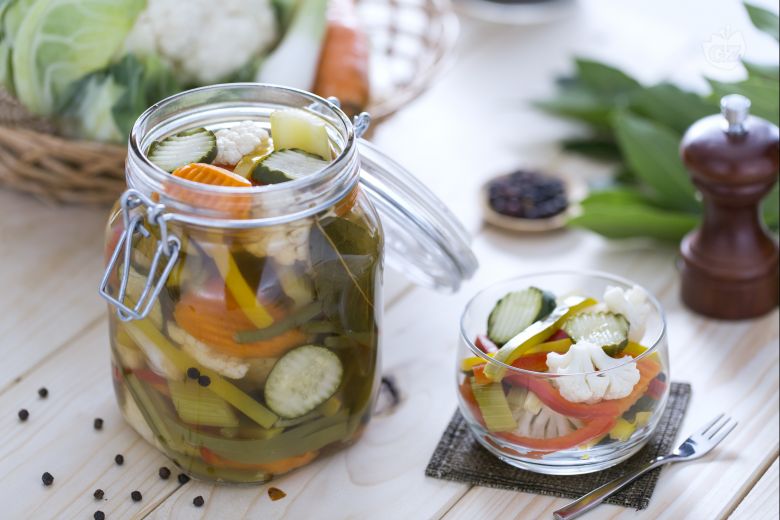
Pickled giardiniera is all about the vibrant colors and crunch of the Italian garden, stuffed into a jar. Honestly, anyone who’s wandered through an Italian springtime garden knows the thrill—really, it's something else—of seeing bright peppers, tender cauliflower, and crisp carrots showing off their best colors. This classic giardiniera recipe brings those vibes right to your table. You know, it makes it super easy to enjoy the flavors of the season even when it’s chilly outside. Italians have been making homemade giardiniera forever, especially up north around Lombardy and Piedmont, where it’s a tradition to pickle the freshest vegetables they can get. Thing is, you get this tangy mix of veggies in vinegar, with each bite reminding you of how good those garden days can be. It's really more than just a snack—it's a way to keep the freshness of spring alive all year long.
Some families like their pickled giardiniera on the spicy side, while others just let the veggies do all the talking. Either way, those crisp bites look beautiful—think red peppers, green beans, and little pearls of cauliflower. And listen, giardiniera isn’t just about looks. It’s a go-to for sandwiches, antipasto platters, or even as a quick side with cheese and bread. The mix of Italian pickled vegetables gives you something zesty and bright, perfect for adding a bit of punch to meals or snacks. In Chicago, folks made their own spin with "Chicago-style giardiniera," turning it into a spicy, oil-packed relish for hot dogs and beef sandwiches. But really, the heart of it still connects back to the Italian practice of preserving garden goodness. People who love making things from scratch find this giardiniera recipe is a cool way to use up extra veggies and add some color to the table. Every time you pop open a jar, it’s like opening up a bit of Italian spring, full of crunch, tang, and good memories. Seriously, enjoying a jar of pickled giardiniera is like bringing a piece of Italy into your home, celebrating both tradition and flavor in every bite.

To prepare pickled vegetables, first wash all the vegetables thoroughly under plenty of fresh running water, then clean them. With a knife, cut the celery into chunks 1/2 inch thick 1, then remove the roots from the spring onions and cut them in half 2; next, clean the green beans by removing the ends 3.

Using a peeler, peel the carrots and then, with a mandolin with a wavy blade, cut them 4 along with the cucumbers 5 into slices 1/4 inch thick. Cut all the peppers and, with a knife, remove the seeds inside 6.

Cut the peppers into strips, not too thin 7, then move on to the cauliflower. Using a small knife, remove the outer leaves, cut the core 8, then detach the florets by cutting at the base where they attach to the main stem 9.

Once you have finished cleaning and cutting all the vegetables 10, place a large pot on the stove with the water 11 and vinegar 12.

Add the bay leaves, salt, sugar 13, black pepper, and juniper berries 14. When the water is about to boil, add the carrots and cauliflower 15, boiling for 3 minutes on moderate heat.

Next, add the green beans, spring onions 16, celery 17, and peppers 18 that you have cut.

Finish with the cucumbers 19 and boil everything for another 4 minutes. Once the vegetables are ready 20, remove the pot from the heat and drain them well, saving the cooking liquid in a bowl 21.

Let the vegetables cool in a steel pan 22 and meanwhile proceed to sanitize the jars and lids as indicated in the guidelines from the Ministry of Health provided at the end of the recipe. When the vegetables have completely cooled, place them in the jar 23, trying to arrange them neatly without pressing them too much. At this point, filter the cooking liquid you set aside and pour it into the jars, covering the vegetables but stopping 1/2 inch from the rim of the jar 34. Seal the jars. If using jars with screw caps, screw on the lids tightly but not too tightly. Then proceed with boiling the jars, or pasteurization, following the guidelines from the Ministry of Health cited at the end of the recipe. If you are using jars with screw lids, once the jars have cooled, check if the vacuum seal was successful: you can press the center of the lid, and if you don't hear the typical "click-clack," the vacuum seal was successful. If after re-boiling you notice the formation of small air bubbles, when the jar is still warm, gently tap it on a surface to bring the bubbles to the surface, where they will disappear naturally. If using jars with rubber gasket closures, when consuming the giardiniera, you can test the vacuum seal by pulling the tab: if it makes a sharp sound, it means the content has been preserved correctly. Conversely, if the gasket feels "soft," it means the vacuum seal was not achieved correctly, and it's better not to consume the contents. Your pickled vegetables are ready to be enjoyed!