How to line a cake tin with parchment paper
For the cooking school, we learn how to line a cake tin with parchment paper so that your sweet and savory dishes won't stick!
- Easy
- 15 min
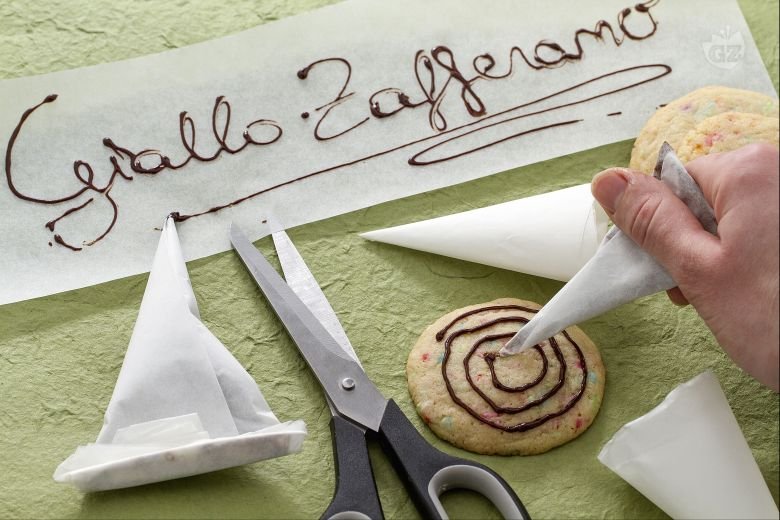
If you've ever needed a homemade pastry bag in a hurry, this parchment paper cornetto trick is a game-changer in Italy. Seriously good. Instead of hunting for some fancy tool, just grab parchment paper and scissors. Really, that's it. With a few twists and folds, you'll have a neat cone ready for action. This method? Perfect for delicate jobs—like drizzling sweet melted chocolate over biscotti or adding thin lines of royal icing to cookies. The best part? You just snip the end to control the tip size for precise decorating. Once you get the hang of making a parchment paper cornet, it's way easier than cleaning a big plastic piping bag.
Whether you're decorating a birthday cake or crafting tender pastries for Sunday lunch, this trick is a lifesaver. In many Italian bakeries, people rely on this DIY piping bag for quick jobs. And you know what? It's especially handy when you need a new bag fast. It's like, classic Italian kitchen smarts—making do with what's on hand while still achieving professional results. Plus, it keeps things tidy since you can just toss the cornetto when you're done. For sure.
This technique is perfect for those into cake decorating or trying to avoid single-use plastics. You don’t need fancy tools—just parchment and patience. Next time you're decorating with crispy chocolate letters or dotting moist icing on cupcakes, try this DIY method. Truthfully, after a few attempts, it starts to feel natural. Your desserts will look sharp, almost like they came straight from an Italian bakery. Pretty much. So grab some parchment, snip a corner, and see how this simple yet effective tool can elevate your baking game. With a bit of practice, you'll be able to confidently decorate like a pro, embracing the resourceful spirit of Italian culinary tradition. It's a small step, but it makes a big difference in the world of baking. Really, really does.
You might also like:

To make a cone with parchment paper, draw a square with 8x8 inches 1 using a pencil and a ruler, cut it out 2, and fold it in half to form a triangle 3.

Join the two corners of the base 4, overlap them, roll the edges of the parchment paper over themselves 5, and close to form a cone (the tip should be formed from the base of the triangle) 6.
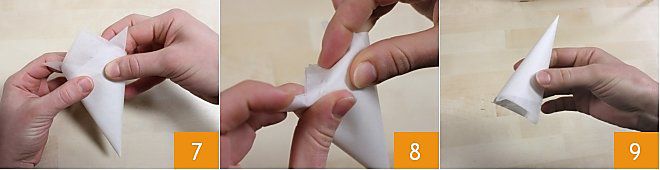
You will have a cone with 3 points facing upwards 7: fold the points inside the cone following their direction 8. Your cone is ready to be filled 9.
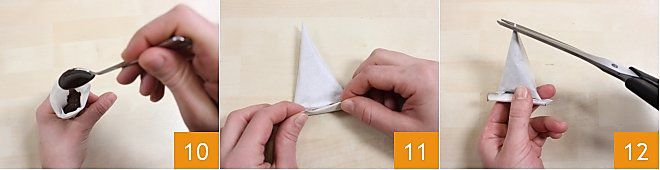
Hold the cone with one hand and fill it 10 just over halfway with melted chocolate, for example, and once this last operation is done, fold the cone towards the tip to close it 11. Gently press the cone to push the chocolate downwards. You can cut the tip to form a wider or narrower exit hole depending on what you want to use it for 12. Your parchment paper cone is ready, now you can get creative with decorations!