

Roll with orange cream and chocolate
- flavorsofitaly
Halloween Chocolate Fudge starts with two things: chocolate and condensed milk. From those, you get a soft slab that sets, cuts into small squares, and takes whatever spooky decoration you want to press into it — no candy thermometer, no elaborate technique, no long list of components. The texture lands somewhere between fudgy and melt-in-the-mouth, which is exactly what makes these small squares easy to eat and easy to share.
Arrange them on a Halloween party spread and they hold their own alongside anything else on the table; tuck them into small bags and they become ready-made gifts for trick-or-treaters. The slab comes together ahead of time, so whether you're building out a full buffet or just leaving something by the door, it's already done.
You might also like:
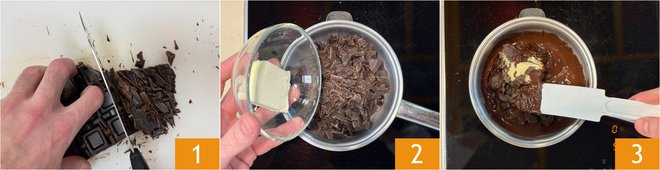
To prepare the Halloween chocolate fudge, start by chopping the chocolate 1. Place it in a small saucepan over a bain-marie, or if you prefer melt it in the microwave, add the butter 2 and let it melt gently while stirring continuously 3.
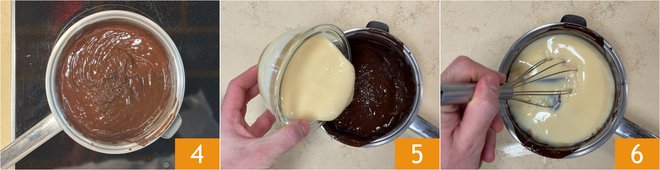
Stir until the two ingredients are well combined 4. At this point pour in the condensed milk 5 and incorporate thoroughly 6.
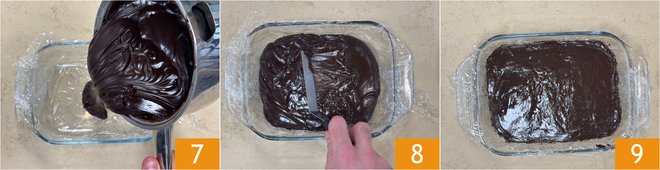
Transfer into an 8 11/16 x 6 in baking pan lined with plastic wrap 7 and level the surface 8. Place in the refrigerator and let rest for at least a couple of hours 9.
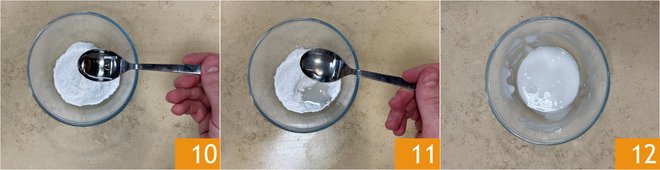
Before serving, prepare the icing by pouring both the water 10 and the lemon juice 11 over the powdered sugar. Stir to obtain a smooth, lump-free mixture; we recommend dividing it into two bowls and adding orange food coloring to one (otherwise you can leave it plain) 12.
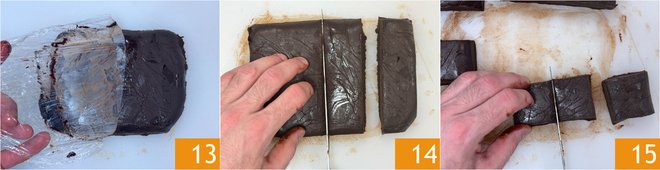
Take the fudge out of the fridge and remove the plastic wrap 13, even out the edges and cut it into cubes 14, obtaining 12 equal pieces 15.
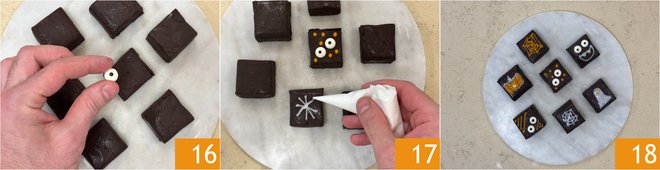
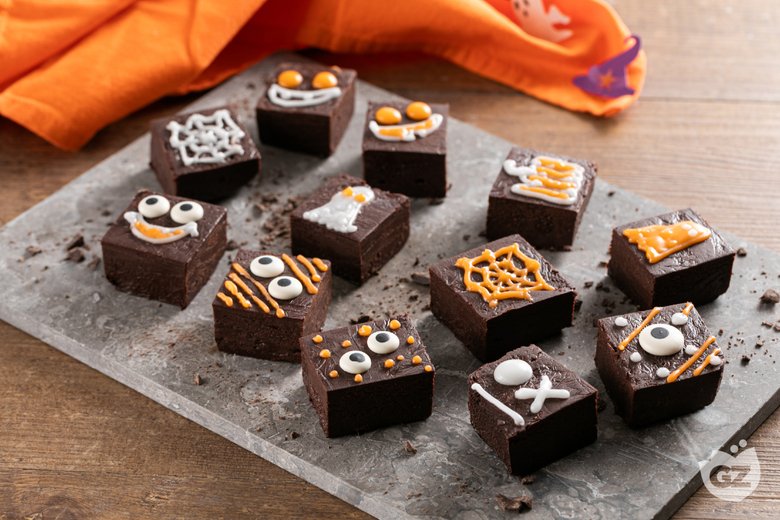
Move on to decorating: on some cubes add sugar eyes 16 and on the others draw spiderwebs, little pumpkins and little ghosts by alternating white and orange icing and using a How to make a piping cone with parchment paper 17. The Halloween chocolate fudge is ready for the party 18!


