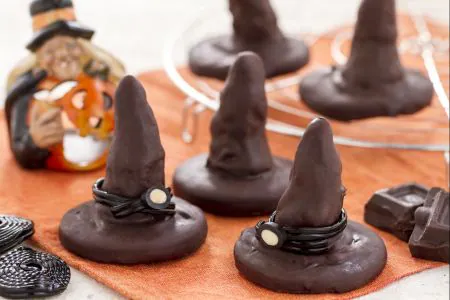
Witches' Hats
Witches' hats are delicious chocolate treats to prepare for Halloween to amaze and delight both adults and children!
- Average
- 1 h 20 min
- Kcal 1060
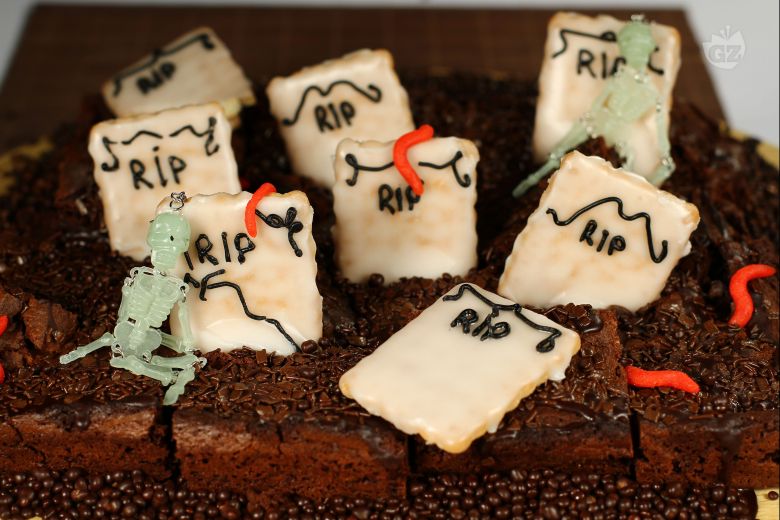
Witches' graveyard desserts are all about setting that Halloween mood with their mix of witches' graveyard vibes and playful style. Seriously good stuff. Picture this: a plate looking like a haunted cemetery—you’ve got a moist chocolate brownie base, all chopped up and spread out to mimic lumpy, disturbed earth. Really, it's rich and sweet under your spoon. Plus, iced cookies decorated like tombstones pop up everywhere. For real, each one adds a new layer of spooky fun. Some folks even toss in candy bones or little crunchy cookie crumbles to up the cemetery feel. Thing is, these treats are as much about the look as the taste, giving everyone a good laugh and a few pretend chills as they grab seconds. It's like something you’d find at a witch burial site or on a table after one of those haunted graveyard tours in October. Pretty much.
Across the U.S., people make this dessert their own, you know? Some swap brownies for gooey chocolate cake or use green-tinted coconut for grass. No question. It’s always the creativity that makes it unique—like those old crumbling tombstones in historical cemeteries, only way, way tastier! Kids love seeing their names on a cookie tombstone, while grown-ups can join the fun with a warm mug of "witch’s brew"—basically, some really good hot tea. The whole thing? It's like stepping into one of those paranormal locations filled with witch legends, just with more chocolate and way less actual scare.
For a Halloween night, a pan of witches' graveyard is going to be the star of the dessert table—everyone will be digging into the tender brownies and the laughs. Can't go wrong. It's a surefire way to make the spooky season even more fun. And look, you might even get inspired to create your own twist, like adding edible glitter for a magical effect. Whether you're hosting a party or just want a themed treat, this dessert is a hit with kids and adults alike, offering a perfect blend of spooky and sweet. For sure.

To prepare the witches' cemetery, start with the brownies by following the procedure found Brownies, but using the amounts indicated in this recipe. Pour the batter into the 8x11 inch 1 rectangular pan lined with parchment paper; bake in a hot oven at 350°F for about 25-30 minutes, then remove from the oven and let it cool in the pan.
Remove the "cake" from the pan and cut it 2 into "brownie" squares; now start creating the cemetery by overlapping the squares on top of each other 3 as you please to create the sensation of churned earth.
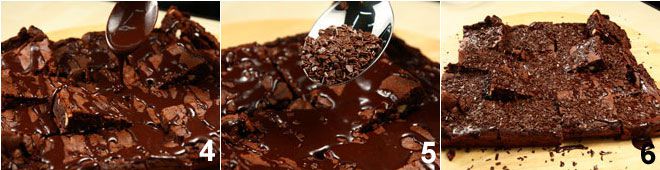
For the chocolate glaze, sift the powdered sugar with the cocoa and gradually add a small amount of boiling water. Mix well to avoid lumps: you should obtain a glaze that's quite thick, almost like a cream (you can adjust the thickness of the glaze with another tablespoon of powdered sugar and half of cocoa or with water). Decorate the cemetery with the chocolate glaze 4 by dripping it with a spoon as desired; cover with dark chocolate sprinkles 5 and then also the chocolate flakes 6.
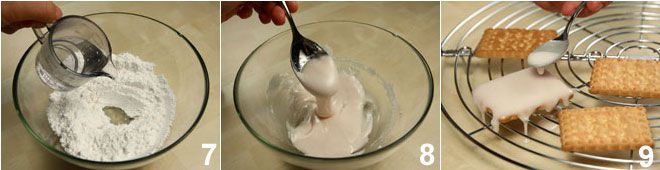
Prepare the white glaze by combining the powdered sugar and gradually adding a small amount of boiling water in a bowl 7 until you get a thick cream (you can adjust the thickness with another tablespoon of powdered sugar or water) 8, with which you will then glaze the dry biscuits 9.

Let the glaze dry well and with a decorating pen (or the chocolate glaze, using a parchment paper cone), write "RIP" 10 on each biscuit-tombstone and let it dry again; place the biscuit-tombstones 11 on the "ground" of brownies in a haphazard manner or to your personal taste.
Your haunted cemetery is ready to be enjoyed 12.