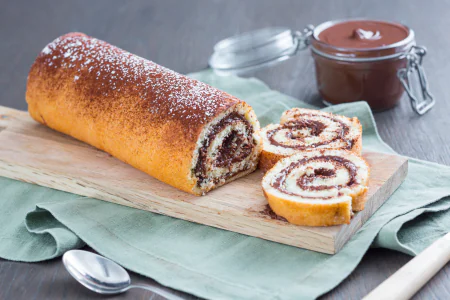

Biscuit dough
Biscuit dough is a pastry base perfect for preparing rolls filled with creams and jams! Find out how to make it at home!
- Easy
- 30 min
- Kcal 179
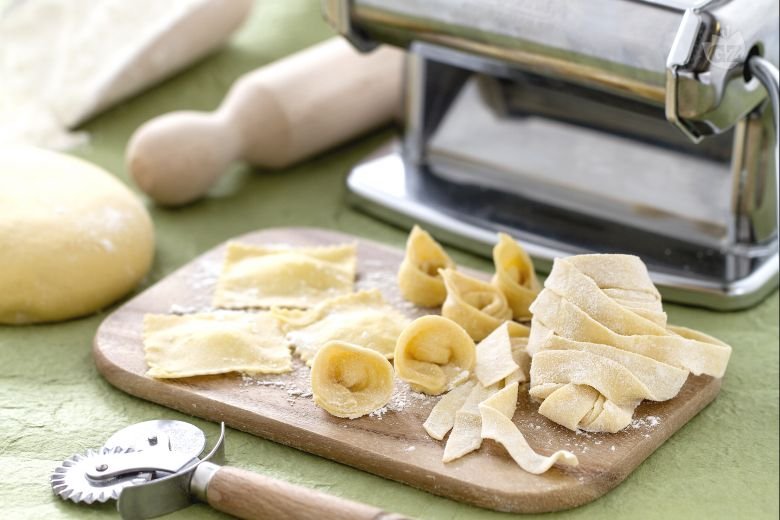
The art of rolling pasta dough in Emilia Romagna? It's not just cooking—it's tradition. Seriously, in this part of Italy, making homemade pasta is like a big deal, where folks take immense pride in nailing that perfect balance of tender and smooth dough. Traditional hand-rolling with a rolling pin is, you know, a skill. It results in ultra-thin sheets, no more than half a millimeter thick. And when you roll, you totally feel the dough’s elasticity—which is awesome—many believe it gives hand-rolled pasta its unique taste.
A pasta machine can simplify everything. For sure. It provides even results, but—and here's the thing—many in Emilia Romagna say hand-rolling really really brings out the pasta’s true character. The key is finding that perfect balance, ensuring the dough is thin enough for stuffed pastas like ravioli or tortellini, yet moist and strong enough to hold shape during cooking.
So, different pasta types need unique pasta dough rolling techniques. For stuffed pastas, the sheet should be almost see-through so the filling shines. But, you know, for pasta like tagliatelle, tagliolini, or fettuccine, a slightly thicker dough makes the noodles soft yet kinda chewy after cooking. This attention to pasta dough thickness is crucial in Emilia Romagna, where even slight changes really impact the final dish.
Whether you choose hand-rolling or a machine, it’s super important to feel and stretch the dough correctly. Here, tradition is not just about making food; it's about respecting the steps like kneading and resting the dough for that perfect, silky finish. By diving into these techniques, you’ll get a taste of homemade pasta in this part of Italy, where each step creates a meal that truly brings people together. And the sauce? Pretty much a bonus.
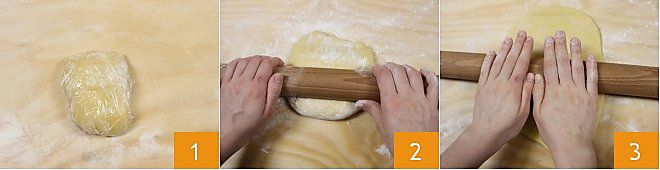
First, prepare a good dough for fresh egg pasta, on a work surface arrange the flour in a fountain shape and break the eggs in the center, gradually collecting the flour around, knead the dough until you get a compact, smooth, and homogeneous loaf. For more information on fresh pasta, click here Homemade pasta (sheets and shapes). Wrap the loaf in plastic wrap and let it rest in a cool place for at least 30 minutes 1. After this time, flour a wooden work surface, which will ensure a rougher dough, and place the dough on it, then start pressing the ball with the rolling pin 2. At this point, with parallel hands, pull the rolling pin from the center of the dough 3
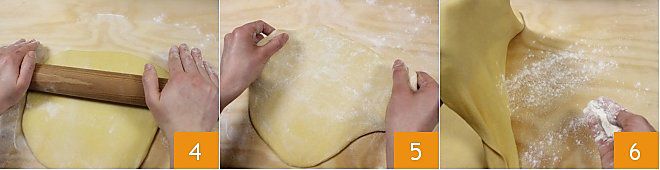
towards the outside letting it slide while pressing with the palms to stretch the dough 4. Each time you roll the dough with the rolling pin, rotate the dough a quarter turn, always proceeding clockwise 5. To prevent the dough from drying out, it is advisable to work it quite quickly and vigorously at least initially. Once the dough has thinned, reduce the pressure exerted on the rolling pin to avoid tearing it. If while rolling the dough it becomes sticky, you can dust it with a little flour to make the rolling operation easier without making the dough hard 6.
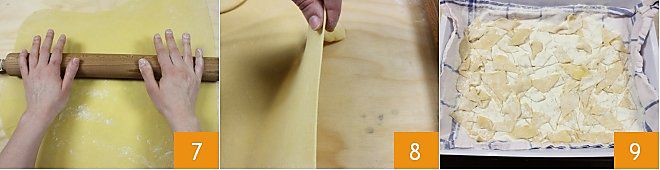
Remember NEVER to flour the rolling pin, only the dough or work surface, because otherwise the dough will stick to the rolling pin. As the dough thins, reduce the pressure on the rolling pin, always pulling from the center of the dough towards the outside 7, check the thickness 8 until reaching the desired one, remember that a perfect dough should be very thin, at most half a millimeter (1/50 inch). Then cut the dough into the desired shape, and place the ready pasta on a well-floured cloth 9 until the time of cooking.
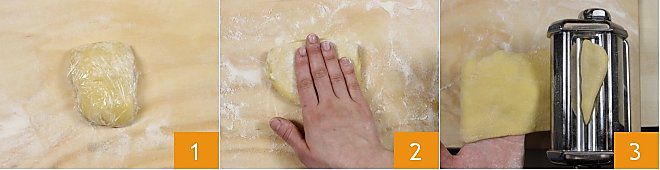
To roll the dough with the specific pasta machine, secure it well to the work surface so it doesn't move, then take a portion of dough from the loaf, making sure to wrap the remaining part well in plastic wrap so it doesn't dry out 1. Flatten the dough with your hands 2, lightly flour it, and pass it through the machine starting from the thickest setting 3.
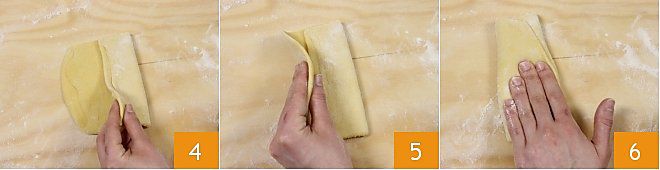
Once you have the pasta, fold one edge 4 and then another edge towards the center of the dough 5 and press lightly 6.
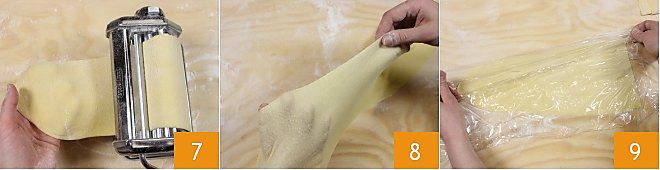
and pass the dough through the machine again at the thinner setting 7, then fold the dough again over itself and pass it through the machine at the thinner setting. Continue like this until you reach the desired thickness 8, always remembering to start from the widest setting until reaching the thinnest one, proceeding gradually and lightly flouring each time. Once you have obtained the dough, cover it with plastic wrap so that it does not dry out while you obtain the others 9.