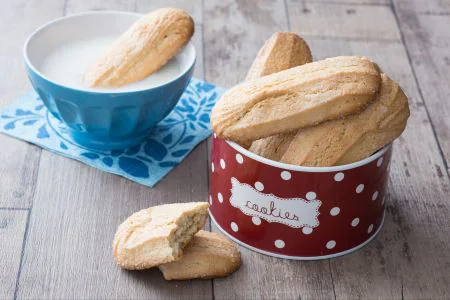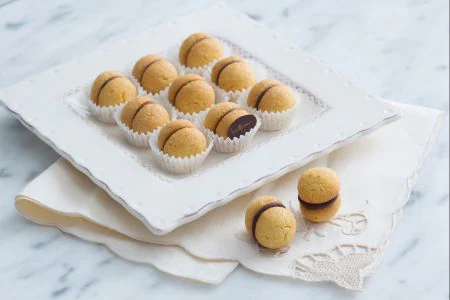
Baci di dama (Hazelnut cookies)
Baci di dama (hazelnut cookies) originate from the town of Tortona: they consist of two round, almond shortbread cookies joined by a layer of…
- Average
- 57 min
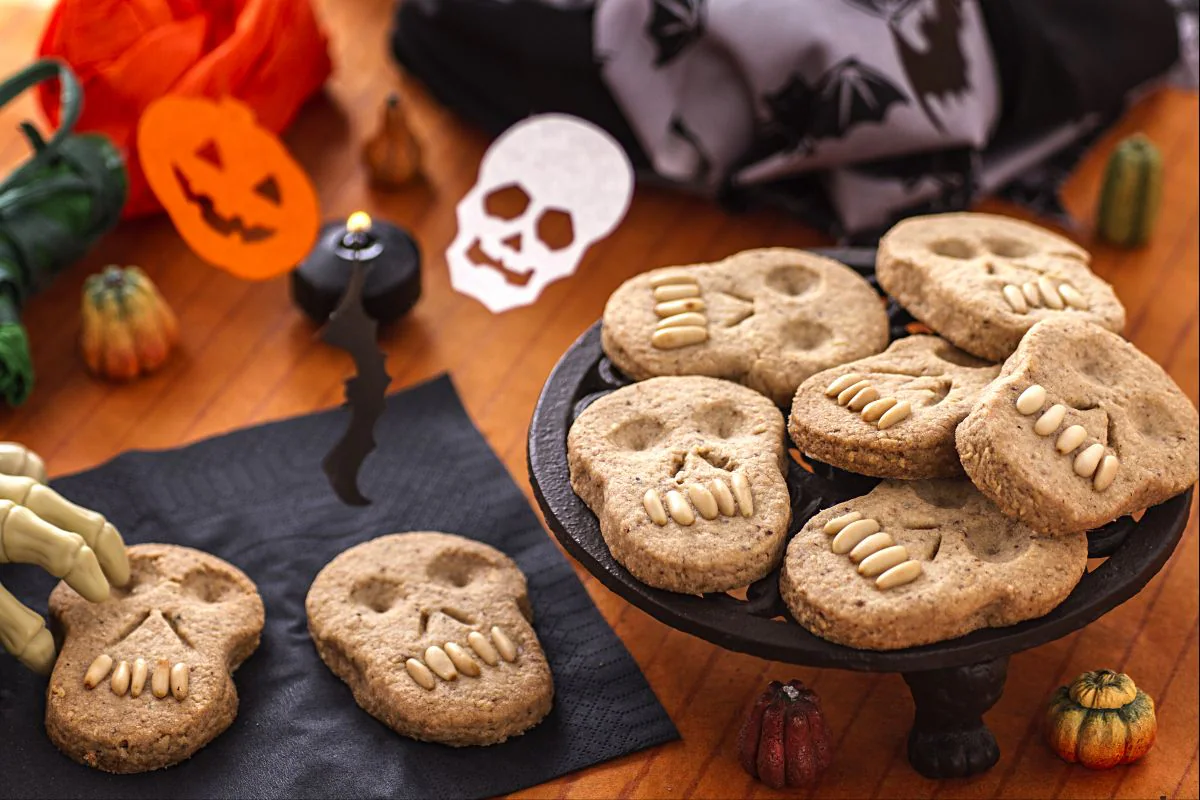
When it comes to skull cookies from Italy, you gotta admit, they're all about adding some fun to your Halloween treats. And listen, these aren’t your typical sugar cookies. No way. Biscotti teschio bring a nutty, tender bite thanks to the hazelnuts mixed right into the dough. In northern Italy, these Halloween cookies add a spooky twist to any table, for sure. Kids love shaping the dough into creepy, skull-shaped cookies.
The trick with using pine nuts for the teeth? It adds a crunchy and grotesque touch that totally fits the Halloween vibe. You can even get creative with the eyes by adding bits of chocolate or raisins. Makes the skull faces really pop, you know? These skull-shaped cookies are playful and perfect for a Halloween buffet if you want your snacks to look as good as they taste.
Halloween in Italy is gaining popularity, and frankly, these spooky cookies are a big part of that trend. Instead of just buying candy, families gather to make these soft, crumbly treats from scratch. Which is great. The kids help with fun tasks like pressing the pine nuts and making silly faces on each cookie. What makes these Halloween cookies so so different from other Halloween treats is their buttery and golden texture, with roasted hazelnuts shining through every bite.
With their cool shapes and realistic skull appearance, they’re not just for eating but also for showing off on the table. Whether you’re hosting a party or just want something unique for your Halloween desserts, these skull cookies bring a bit of Italian holiday baking right into the spooky fun. Really, if you’re after something playful with awesome flavor, these cookies are the ones everyone will want to grab. Plus, involving the kids in making these treats adds a layer of excitement—making the experience memorable and engaging. So, why not try them out and add a touch of Italy to your Halloween celebrations? Can't go wrong.
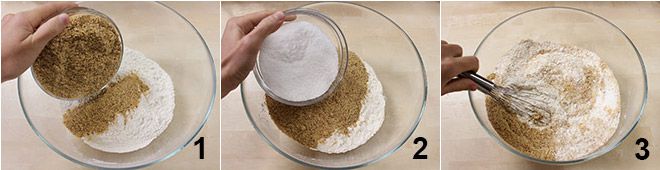
To prepare the skull cookies, start by placing the all-purpose flour, hazelnut flour 1, and sugar 2 in a bowl. Mix with a whisk 3,
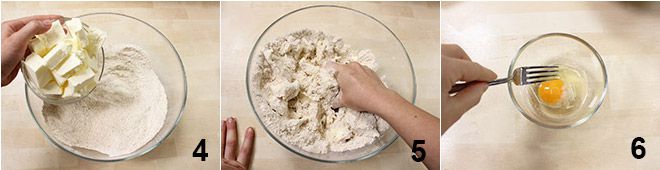
add the butter cut into pieces 4 and start kneading with your hands 5. In a small bowl, beat the egg with the salt, adding the seeds from the vanilla pod 6;
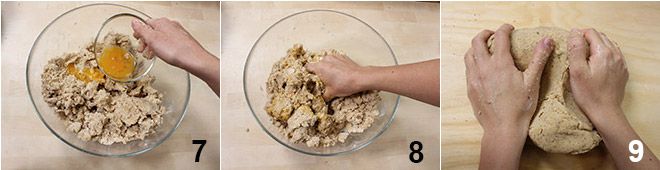
pour everything into the bowl 7 and continue kneading 8. Now transfer the crumbly mixture onto a lightly floured pastry board and knead with your hands until you get a soft and compact dough 9.
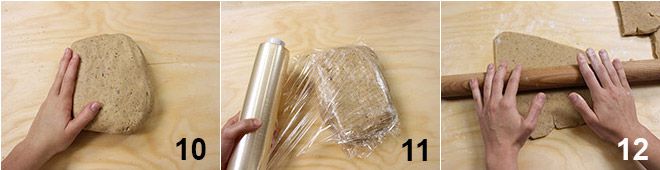
Slightly flatten the dough with your hands 10, cover it with plastic wrap 11, and let it rest in the refrigerator for at least an hour. After the necessary time, flour the pastry board again and roll out the dough with a rolling pin until it is about 3/8 inch thick 12.
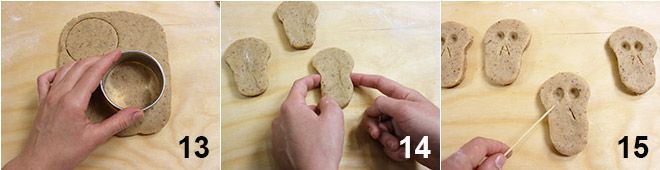
Use a cookie cutter to form discs with a diameter of 2 3/8 inches 13 and press with your fingers on two sides of the disc to create the shape of a skull 14. Use the handle of a wooden spoon to form the eye sockets and a toothpick (or a knife) to draw two lines that will form the nasal cavities 15.
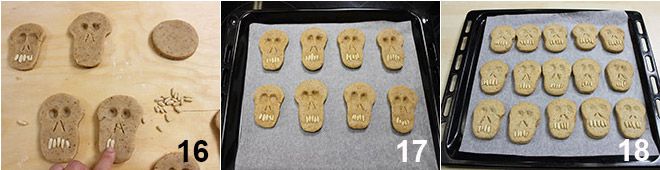
Finally, use the pine nuts to create the teeth, as shown in the picture 16. Now place the cookies on a baking sheet lined with parchment paper 17 and bake them in a preheated oven at 356°F for 20 minutes. Once baked 18, let them cool on a wire rack: your skull cookies will be ready to enjoy in no time!