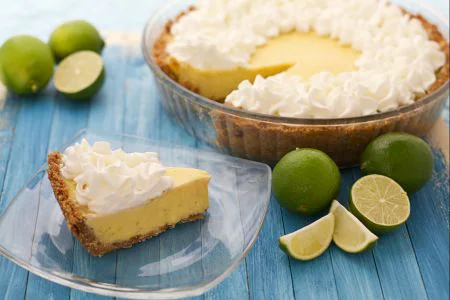
Key lime pie
Key lime pie is a fresh and delicious American-origin tart, made with a biscuit base and a cream of condensed milk and lime.
- Easy
- 55 min
- Kcal 211
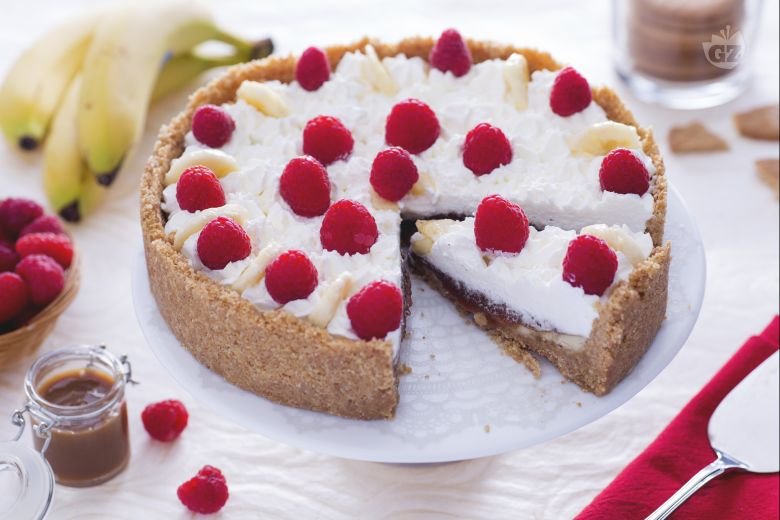
Banoffee pie—really, it is a thing—is from East Sussex, England and brings together all the deliciousness of a classic British dessert. You know, the name comes from blending banana and toffee. Makes perfect sense when you think about it. This homemade banoffee pie starts with a crunchy biscuit base that has this nice crispy bite—super tasty—and it holds up perfectly under a thick, sweet layer of dulce de leche. Then, slices of ripe banana add that moist texture and fresh fruit vibe. Traditionally, folks top it with a mountain of fluffy whipped cream. Looks awesome, tastes even better.
And some people in England? They toss on a few raspberries or maybe a dusting of cocoa powder for that pop of color. Or, you know, some chocolate shavings or a hint of coffee in the cream, which really, really ups the game for this easy banoffee pie.
Here's the deal: What makes the banoffee pie recipe stand out is its no-bake style and, frankly, that perfect mix of flavors. The toffee—made from slowly cooked condensed milk—creates this sticky, golden layer that pairs beautifully with the tender bananas. And listen, each bite of this classic banoffee pie combines the tangy fruit, rich caramel, and cool, creamy topping. Some folks like to mix it up—add a bit of espresso or chopped chocolate to the crust. Just a little kick.
No matter how you make it, this homemade banoffee pie is a simple, crowd-pleasing treat—seriously good—for birthdays, weekend meals, or whenever you crave something different. With just a handful of ingredients and a fun backstory from England’s East Sussex, this banana toffee pie is a no-fail way to impress friends and family. Give it a go and get hooked on the creamy, indulgent charm of this famous dessert. It's a really, really good way to end any meal on a high note, leaving everyone wanting more. For sure.
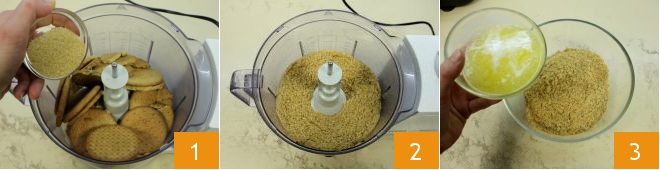
To prepare the banoffee pie, start with the base; begin by melting the butter (in the microwave or a double boiler), then place the Digestive biscuits (or other dry cookies) with the brown sugar in a food processor with blades 1. Grind everything finely 2, then transfer the sandy mixture into a bowl and add the melted butter 3.
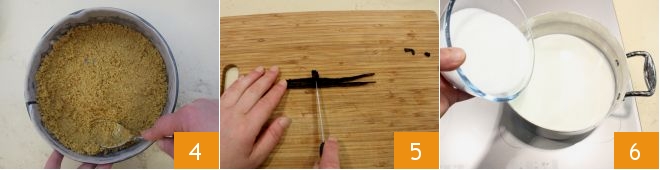
Mix well and transfer the base into a 9.5-inch diameter pan lined with parchment paper (preferably a springform pan for easy removal, but a regular pan will also work): use the back of a spoon to firmly press down on the base 4 and the edges of the pan. Allow the base to set in the refrigerator for at least 1 hour. Meanwhile, prepare the Dulce de leche; cut the vanilla bean lengthwise and scrape out the seeds with a small knife 5. Place a saucepan with a rather thick or non-stick bottom on the stove, pour in the milk, and add the sugar 6, heat over low heat and stir with a wooden spoon.
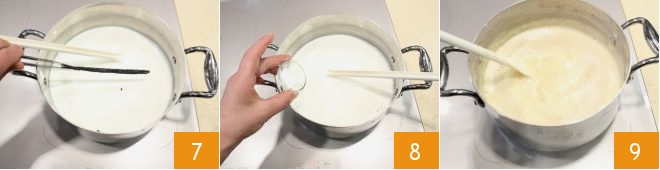
Add the vanilla bean and its seeds 7 and the baking soda 8, stir again. Continue cooking until the milk reaches a boil 9,
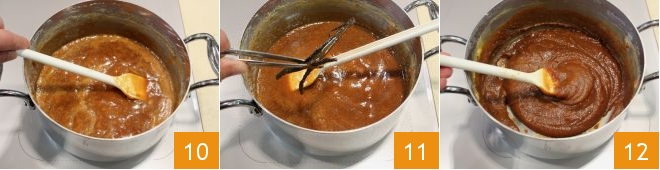
then stir again until the cream obtained darkens 10. At this point, remove the vanilla bean with kitchen tongs 11 and continue to cook the dulce de leche over medium heat until it reaches a viscous consistency similar to caramel sauce: it will take about 2 hours 12. Turn off the heat and let it cool slightly.
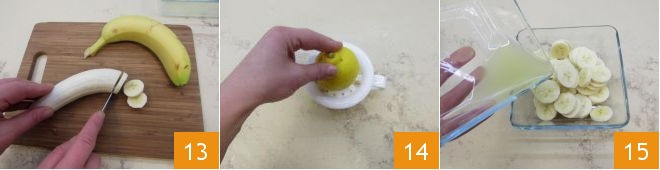
Slice the bananas 13, squeeze the juice of a lemon 14, and place the slices in a bowl with the juice to prevent them from browning 15.
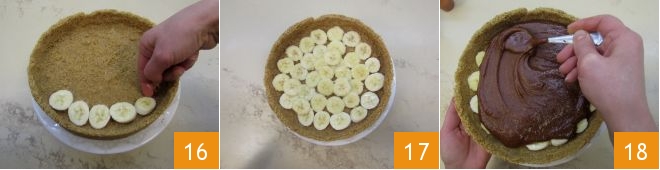
After the necessary time, remove the base from the refrigerator and place the banana slices next to each other in a circular pattern 16, reserving some for the final decoration. Once finished 17, use a teaspoon to distribute the slightly warm dulce de leche over the banana slices 18,
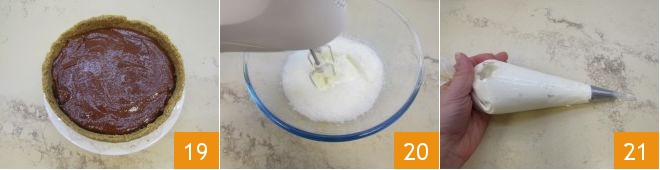
smoothing the surface well with the back of the spoon 19. Transfer the pie to the refrigerator for another 20 minutes. Then whip the cream 20 and place it in a piping bag with a star tip 21.
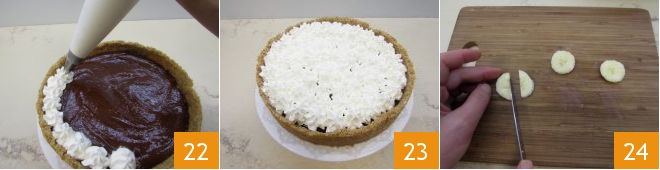
Decorate the pie using the piping bag to make dollops of whipped cream 22, covering the dulce de leche entirely 23. Cut the reserved banana slices in half 34 and
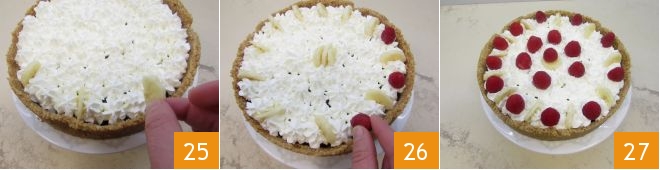
arrange them as desired on the pie as decoration 25; finish by adding raspberries on the sides and in the center, alternating them with the banana slices 26: your banoffee pie is ready to be served 27!